
Today we are going to talk about the Print and Cut feature in Cricut Design Space. This feature lets you print an image from your printer and then cut it on your Cricut. For this project I am going to make a Donald Duck puzzle using a photo I took at one of our trips to Walt Disney World.
Here is what the finished project looks like. Now let's go through the steps on how to get here.

First, I picked the image I wanted to use and uploaded that into Cricut Design Space and picked the complex image choice because I wanted to be sure that all of the colors and details came through.

When you get to this screen, make sure to click to save the image as a Print Then Cut image

Then you will select that image to add it to your Cricut Design Space Canvas. You can see that it is in the list of the images I have uploaded in the image below.

Since I knew I wanted to do this as a puzzle, I searched Cricut Design Space and found a great puzzle image to use and inserted that into my canvas.

Next, I resized the group of puzzle pieces to be 5" x 5" and made them all white, since I wanted to place the Donald Duck image on the puzzle pieces and have those be the colors of the shapes, not the green/yellow/blue combo that was originally on the puzzle image.

Next, I made a 5"x 5" square that I used to trim down the Donald Duck image so that it fit perfectly on the puzzle. Just insert a square, change the size to 5"x 5" and then place it over the Donald image and select both the square and Donald and hit the slice button.

Next I selected both the Donald image and the puzzle image at the same time (hold down the shift key) and used the Align tool at the top of the screen and picked Center. This perfectly aligns the two images over each other, centering them.
Before Align . .
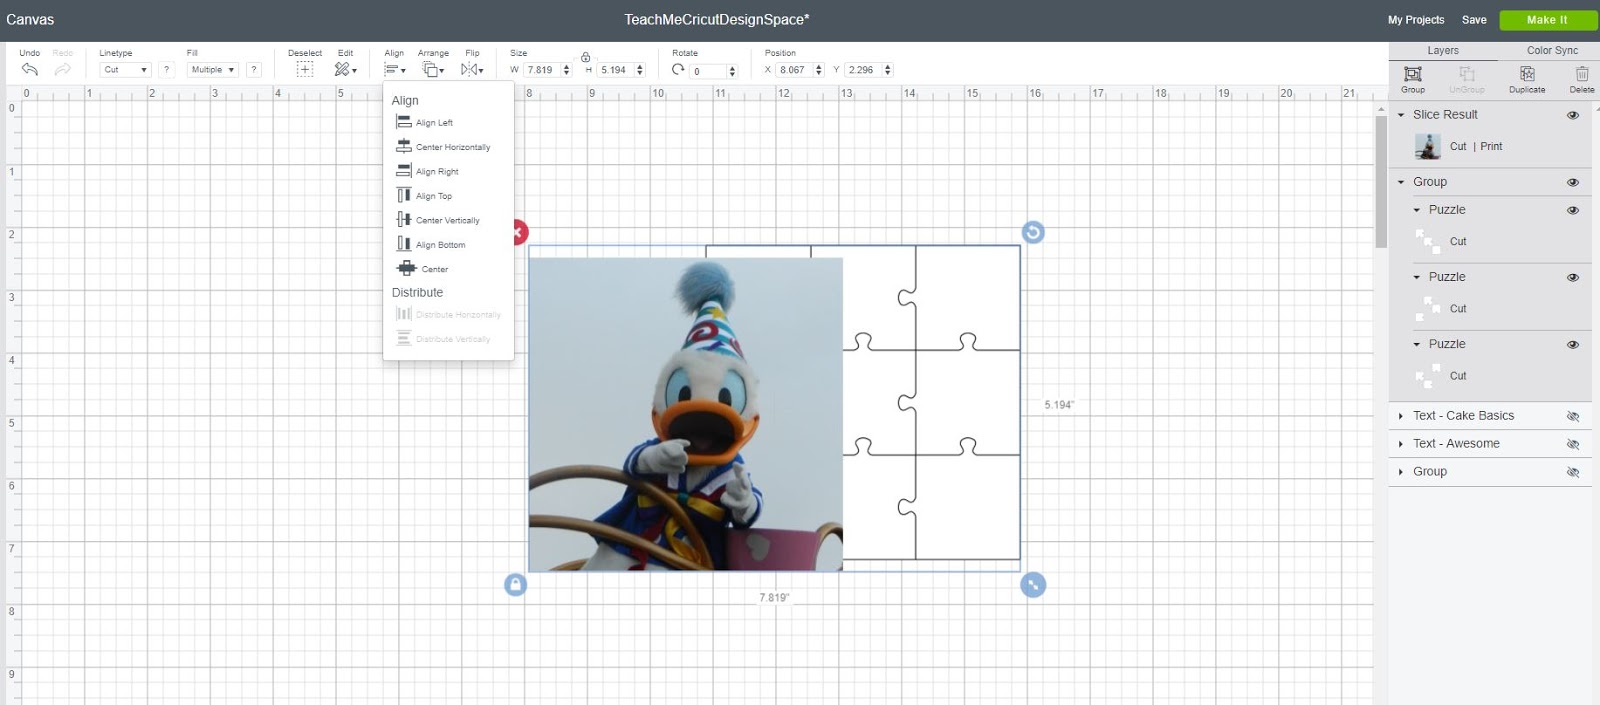
After Align . . . you don't see the puzzle now since it is behind Donald.

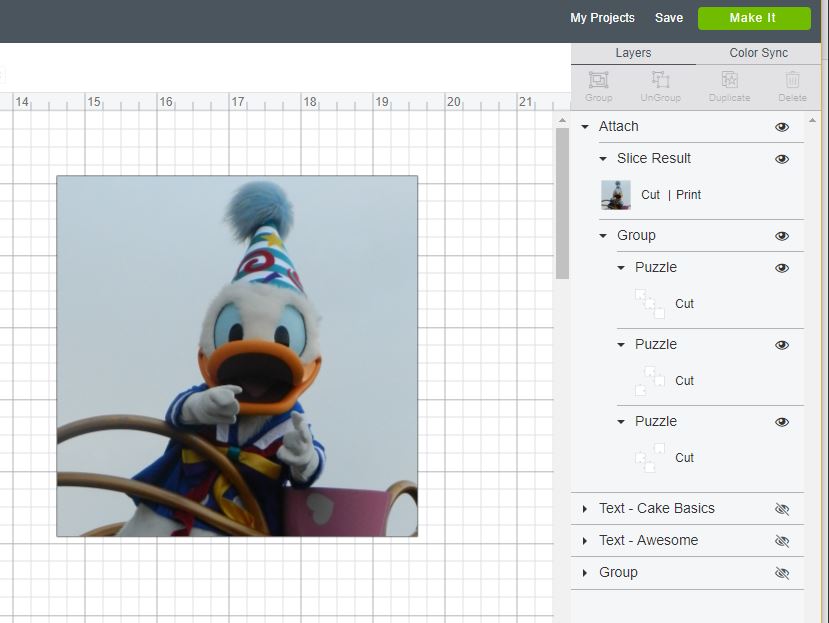
Now let's Attach the Donald image to the puzzle piece. Select both the Donald image and the puzzle and the Attach button will turn on in the lower right corner. I circled it in the next image for you.

Now let's stop and look at the layers panel on the right hand side of the screen. You can see next to the small preview of the Donald Duck image it says Cut / Print . . . that shows you that the Cricut will do both of those functions for this image. (Personally I think it should say Print / Cut since that is the order that the steps will happen) Next to all of the puzzle pieces, it just says Cut so those will not get printed . . . just cut.
So now it is time to make the project. First step will be sending it to the printer. My printer is an Epson ET-4550
This is the first screen you will see. The thick black line around the image are the Registration Marks. When you put the printed image on your Cricut cutting mat the Cricut will look for these registration marks to know where to cut the image.

Also, at this step you will be able to choose if you want he bleed on or off. What is bleed? If you think of coloring with a marker, and if you hold that marker in one place the color kind of bleeds and spreads . . . that is what this bleed is. It spreads the color from the outside of the image a little bit. I will show a photo of the bleed in a second.
I decided to put the bleed to on, since I wanted to make sure that the puzzle pieces cut inside the image.
Once that is printed, you will put the paper on your Cricut mat and load it into the machine.

It cut perfectly because of the registration marks. Can you see the cut of the puzzle pieces in this image?

And in this image, you can really see the bleed. It cut right through that bleed so that my coloring went all the way to the edge of my puzzle pieces.

I hope that this tutorial taught you something new, and helped you to understand the Print and Cut feature of Cricut Design Space. I also did a video so that you can see all of the steps come together.
Keep following me and join my Teach Me Cricut Design Space group on Facebook!
Thanks!
Shawn's Teach me Cricut Design Space Group
Crafty Chic's Blog on Facebook // YouTube // Instagram // Crafting Pixie
No comments:
Post a Comment