I was asked to make a tutorial about how to do a product mock up in Cricut Design Space. First, a mock up is taking a image of a blank item like a shirt, coffee mug or bag and then placing a design on top of that image to simulate what the finished project will look like. The bad thing about this is if you don't have a shirt, coffee mug or bag that are the exact same dimensions and materials as what is used in the mock up, then when you send the customer the finished project they might not be happy with the end result. Personally, I don't use mock ups. I send people a screen shot of the image I designed and they have to visualize how it will look once it is on the shirt, coffee mug or bag.

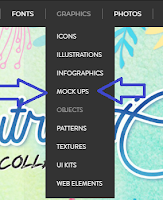
To start off with, you should find some nice mock up backgrounds to use. I found some at The Hungry JPEG If you look under Graphics and then go to Mock Ups you will see a lot to choose from.
You can buy bundles for just shirts, or collections that would have a variety of items. They have some great high quality images to choose from. Once you have a bundle you like, save those images to a folder on your computer.
Now that you have your mock up image in Cricut Design Space, let's place an image on top of it. I did a video where I showed you how to slice Mermaid scales out of a Mickey Mouse icon. If you missed that video you can click HERE. So for this mock up let's pretend I was going to iron that Mickey Mouse mermaid image on to a baby onesie.
I have both the mock up of the onesie and the Mickey Mouse mermaid image in Cricut Design Space. I moved the Mickey Mouse to the middle of the onesie but the image is hidden behind the mock up image so I use the Arrange feature at the top of the screen and select Bring To Font for the Mickey image.
Once the Mickey is arranged to the front, I can resize the Mickey to fill more or less of the onesie.
The last step would be to take a screen shot just inside of the background image of the mock up. I like to use the snipping tool when I do screen shots. It allows me to easily pick the area I want to capture. When I do that for this project, this is how the finished image turns out.
And I can quickly change the image on the shirt to show other images I could use. Maybe a tie for a gift to the new baby.
Or how about something to show Mom some love like this
Thanks!
Shawn's Teach me Cricut Design Space Group
Crafty Chic's Blog on Facebook // YouTube // Instagram // Crafting Pixie


No comments:
Post a Comment