
Have you ever wanted to make an image with your Cricut that is larger than the size of the 12" x 12" mat? If you answered yes, then you have come to the right place! This winter I made this Donald Duck image that is almost 18" tall to put on the wall as a holiday decoration.

Here is how I did it. I started by searching in Cricut Design Space and finding a Donald Duck image that I liked. Remember, you can follow these steps with any image!

When the image comes in to Design Space it is only about 4" tall, but if you click on the image you can resize him by using the double arrow in the lower right corner of the image. The other way to resize is to type in the size you want him to be in the control panel above the image.
I did a quick video to show how to resize.
Now since we know we are going to make him big we have to think about how Cricut Design Space works for a minute. Every image that you are going to cut will be cut using a 12" x 12" mat. Cricut factors in a little space for you on that mat so you are not cutting right up to the edge of your paper, so each image, or each part of the image you are going to cut must fit inside of a 11.5" x 11.5" square
So for this project I adjusted the width of Donald to be 11.5", which makes him just under 18" tall.
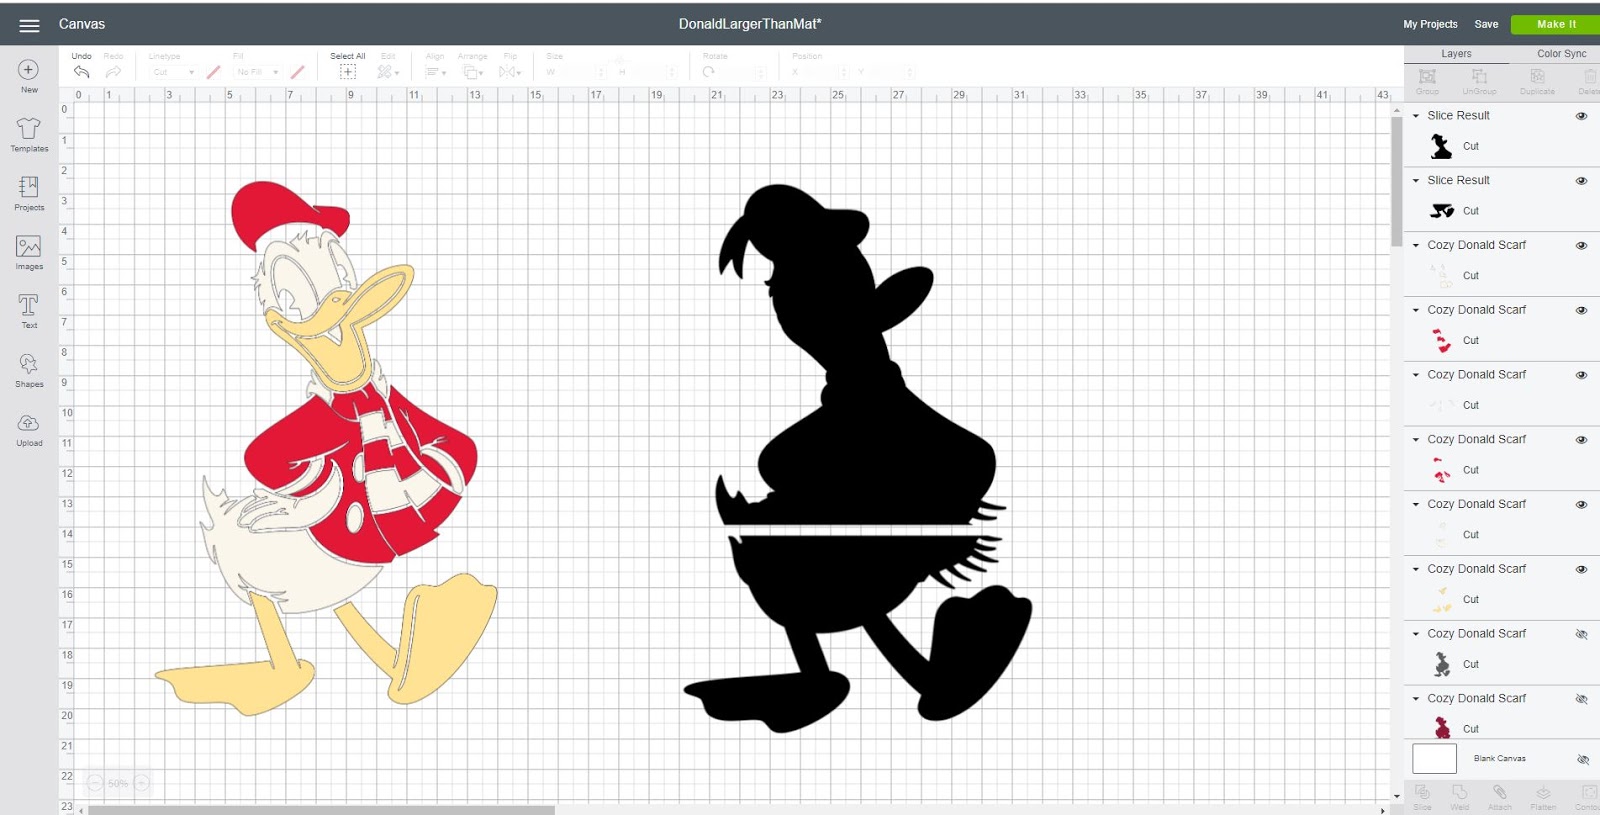
The I like to ungroup the colored layers so that I can work with just the black layer. Click on the image and you will see the ungroup button in the upper right corner of Design Space. Here is a little video to show you how I ungrouped the image and then pulled the black piece off to the side.
So now you will have something that looks like this. This is where your mind will be blown and you will really see how to turn this big image into something you can cut on a 11.5" x 11.5" mat space.

Now what we want to do is slice the black part of the Donald Duck image to fit into the 11.5" x 11.5" space that Cricut Design Space allows you to cut inside of. Go to the shapes button on the left hand side and insert a square. Make that square 11.5" x 11.5" . . . the same size as the cutting space on a Cricut mat. Place that square over the black part of Donald like in the image below.

Now you are going to select both that square and the black part of Donald. If you hold down the shift button it allows you to select more than one piece/image at a time. In the lower right corner of the screen select the slice button. Think of slice like a cookie cutter. You are cutting the top have of Donald out of a 11.5" x 11.5" square sheet of cookie dough. I love to use real life analogies to help people understand something.
Okay, did you slice him? Now you can delete the square, and all of the other pieces that might have sliced behind the image . . . think of those as the crumbs if we are going with the same cookie making analogy. (I am starting to get hungry for cookies now)
Once you delete the square and the crumbs, you will have an image like this . . .
All of the other parts of Donald . . . the white, red and yellow . . . do not need to be sliced in this example since no one section is larger than 11.5" x 11.5". If any of them were, I would slice those apart. I would recommend being strategic when you slice to reduce the number of seams you will have. For example, if I was doing this image even larger, I could slice Donald's legs so that one leg is inside one 11.5" x 11.5" square and the other leg is in another 11.5" x 11.5".
Okay, back to the image we are working on . . .
Now when I hit make it, there will be two mats for the black pieces. One for the top half of Donald and one for the bottom half. Once they are cut, I flip them over on my craft table and use some clear tape on the back of the image to seam the two pieces together.

Here is a close up of the seam. I know, it is not pretty but remember this is the BACK SIDE of the whole image so this side will be stuck to the wall. (the rolled up tape is because I had this hanging on the wall and took it down to take the pictures of the back side)

Now cut all of the other colors and add those pieces to the front and you cannot even see the seam from the front side. None of the colored sections were bigger than 11.5" x 11.5" so they all fit on their own mat and then I just glued them on top of the black piece like a giant puzzle.

I hope that helped you to understand that you can make an image larger than the size of the Cricut mat by using slice. If there is any part of this that is not clear, let me know and I can help you understand it and update my post so that this can be an even better tutorial for everyone.
Keep following me and join my Teach Me Cricut Design Space group on Facebook!
Thanks!
Shawn's Teach me Cricut Design Space Group
Crafty Chic's Blog on Facebook // YouTube // Instagram // Crafting Pixie
Great tutorial. Thank you
ReplyDeleteGreat tutorial. Answered so many questions. Thank you!
ReplyDelete