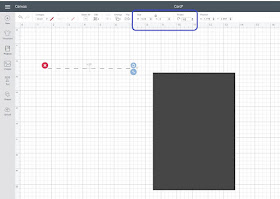
For this basic card, you will be using the Shapes function in Design Space, so all of the parts are free to use. You will also learn how to use the scoreline to make the center crease in your card. You will learn how to use Align to center that scoreline on the card base, and Attach to hold the placement and position of the scoreline on that base.
Let's get started! I am going to describe the steps as I show you the cards I made, and then at the end there will be a video that shows you how all of the steps come together.
First, I inserted a square using the Shapes function in Design Space.
Next, I clicked on the little padlock icon in the corner of the square so that I could make the square into a rectangle. I made my first rectangle 5 1/4" by 7 1/2", but you can make your base any size you want. Just make sure that the overall size of the finished card will fit inside of your envelope.
Next, I went back to the shapes button and inserted a scoreline.
I adjusted the length of this scoreline to match my card base (5 1/4") and made sure that it was rotated to be the same direction as my card base.
Then I selected both the card base and the scoreline and use the Align function and clicked Center. This perfectly centers the scoreline on the base of the card.
Next we want make sure we hold that scoreline placement when we make the card, so with the card base and the scoreline selected I click on Attach button in the lower right corner of the screen. Attach holds the placement and position of an item. In this case we are holding the placement and position of the scoreline on the card base.
Next, I made two more rectangles following the same steps as above (insert a square, unlock it and change the dimensions) The first rectangle will be slightly smaller than half of the base card. Your dimensions will depend on how much of a border edge you want showing of each card layer. For mine I went with 5" by 3 1/2".
From here, I duplicated that rectangle and then adjusted the size of the duplicate rectangle to be
4 3/4" by 3 1/4". Now I have a card base, and two card layers that I can stack on top of the card base.
Make sure to make each piece the color you would like it to be for the card, so that the Cricut will automatically separate them into different cutting mats for you. If you have a hard time selecting just one layer at a time try selecting things from the layers panel on the right. You can see in this image above that I have just the blue layer selected, since the background of that layer on the layers panel is darker. This allows me to pick just that layer, and then go to the top panel and select the color to change it.
After you have cut and assembled the basic card, you can use image, stickers, washi tape and other embellishments to decorate the card like I did for the examples here. Each one is different, but all of them started with the same basic base.
Here is the video that shows all of the steps that I detailed out above come together.
If you want to use the Cricut Design Space file that I created for the base card you can click HERE to access that and add it to your projects, but my hope is that after reading this tutorial and watching the video you feel like you can create this same card base all on your own.
Keep following me and join my Teach Me Cricut Design Space group on Facebook!
Thanks!
Shawn's Teach me Cricut Design Space Group
Crafty Chic's Blog on Facebook // YouTube // Instagram // Crafting Pixie


Can I make money from gambling sites or bet online?
ReplyDeleteNo, it is not true. It is a strategy of taking advantage of bets by making a งานออนไลน์ huge 바카라 사이트 profit on a football match. 샌즈카지노 The key to